Like everyone else on the planet, I love a good barn wood wall. It just makes a room feel so cozy, rustic and full of character. So when Bryan suggested we do a feature barn wood wall in our dining room I said “YES!” And when he said we should do it from scratch I said “HELL YES!….but, wait….um, how??” This, my friends, is why Bryan is the mastermind behind our home renos, and not myself.
We didn’t want to pay an arm and a leg to get pre-made weathered barn wood from a store. And we didn’t have the time to drive around the countryside, bargaining with farmers to buy their old pieces of wood. So, we took a ride over to our local Lowe’s and purchased 25 brand spanking new knotty pine planks, for a total of $250. And this is where the fun began…
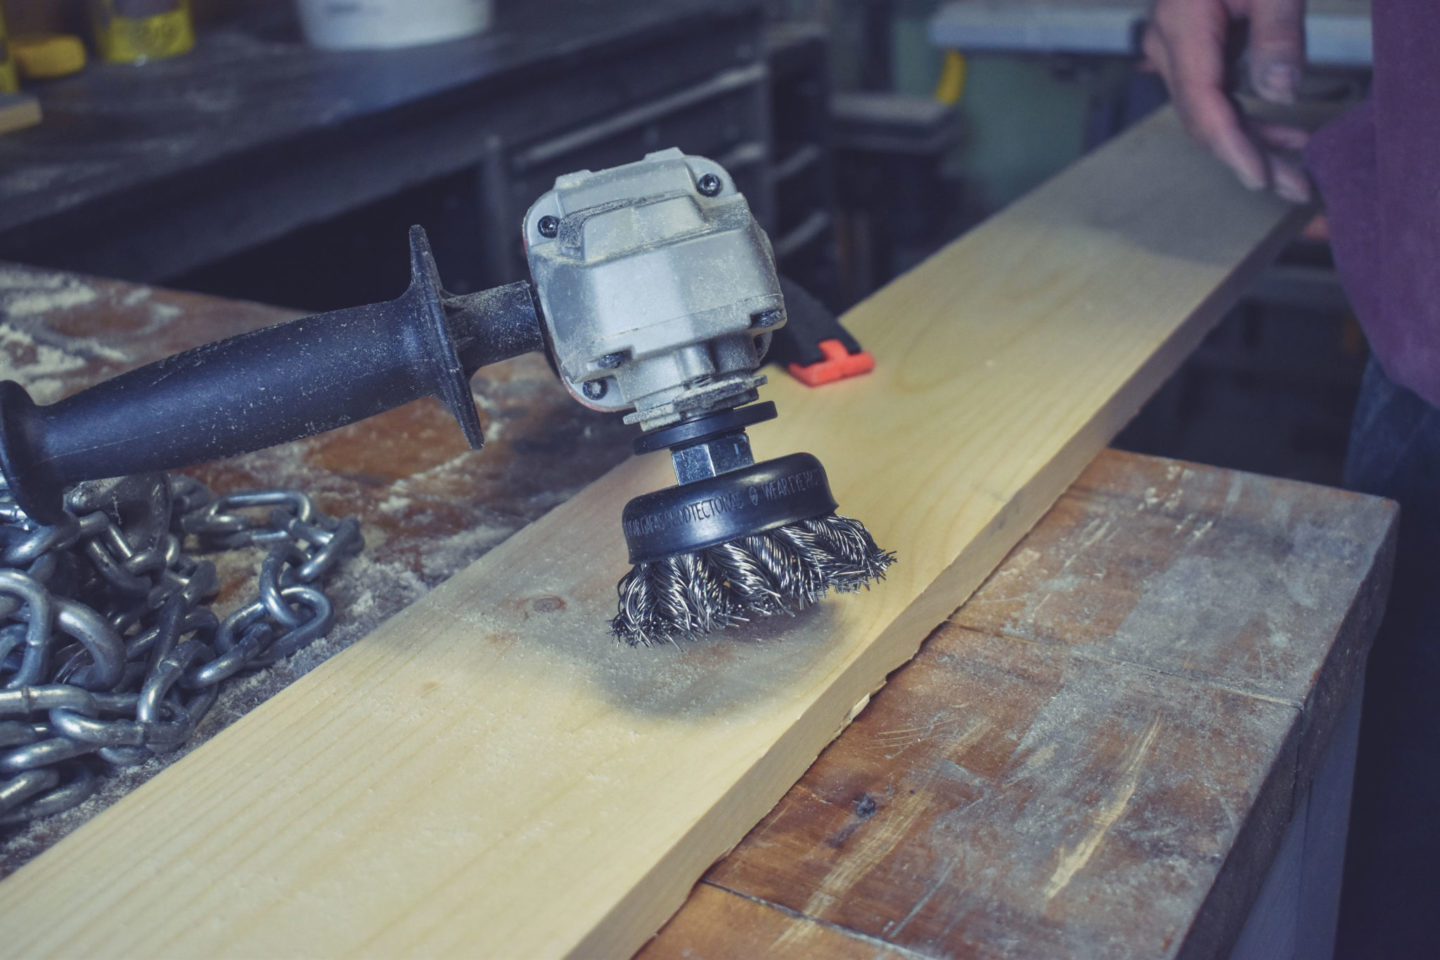
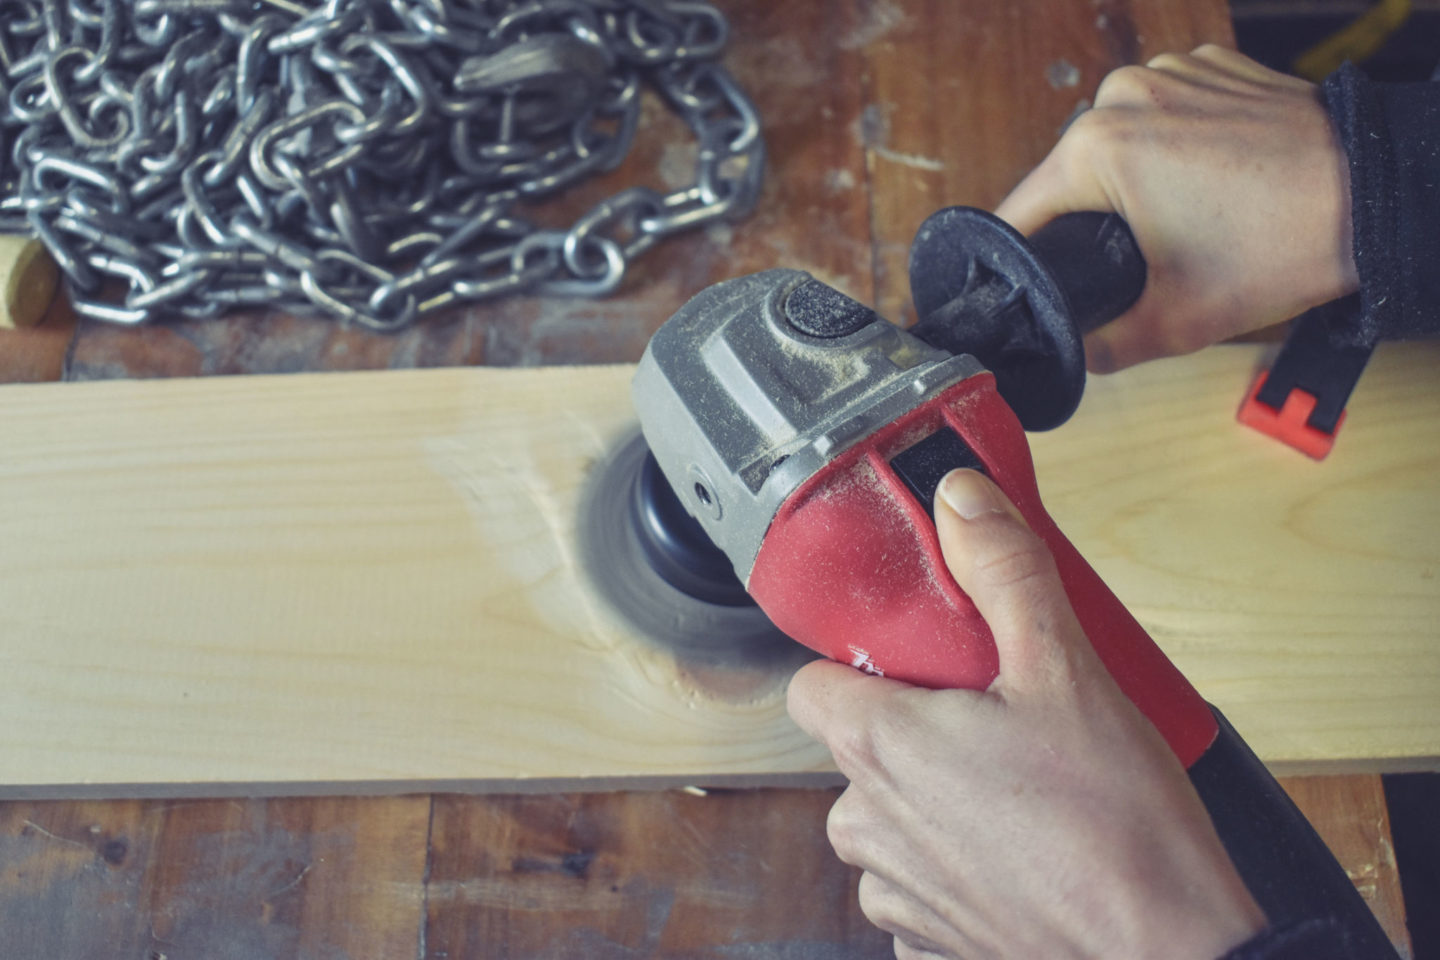
The garage is filled with power tools of all kinds, which I’ve always thought seemed a bit excessive. That is, until Bryan gave me control of the knot brush for step one of the process. The purpose of the knot brush is to roughen up the perfectly smooth boards. We wanted them to look old, weathered and beaten up. The fun part about that is that you get to go at the board with no plan and no precision. You can be as messy and sloppy as you want. For someone who can be a perfectionist at times, it was AWESOME. Free reign to not over analyze every move I made? SWEET! I could use the sides of the brush to create deep grooves, slide it over the edges to splinter them, and hold the grinder in one place to make mesmerizing circular shapes. Mostly I was just impressed that Bryan actually trusted me with a tool that could easily slice your finger off. He must not think I’m as clumsy as I do!
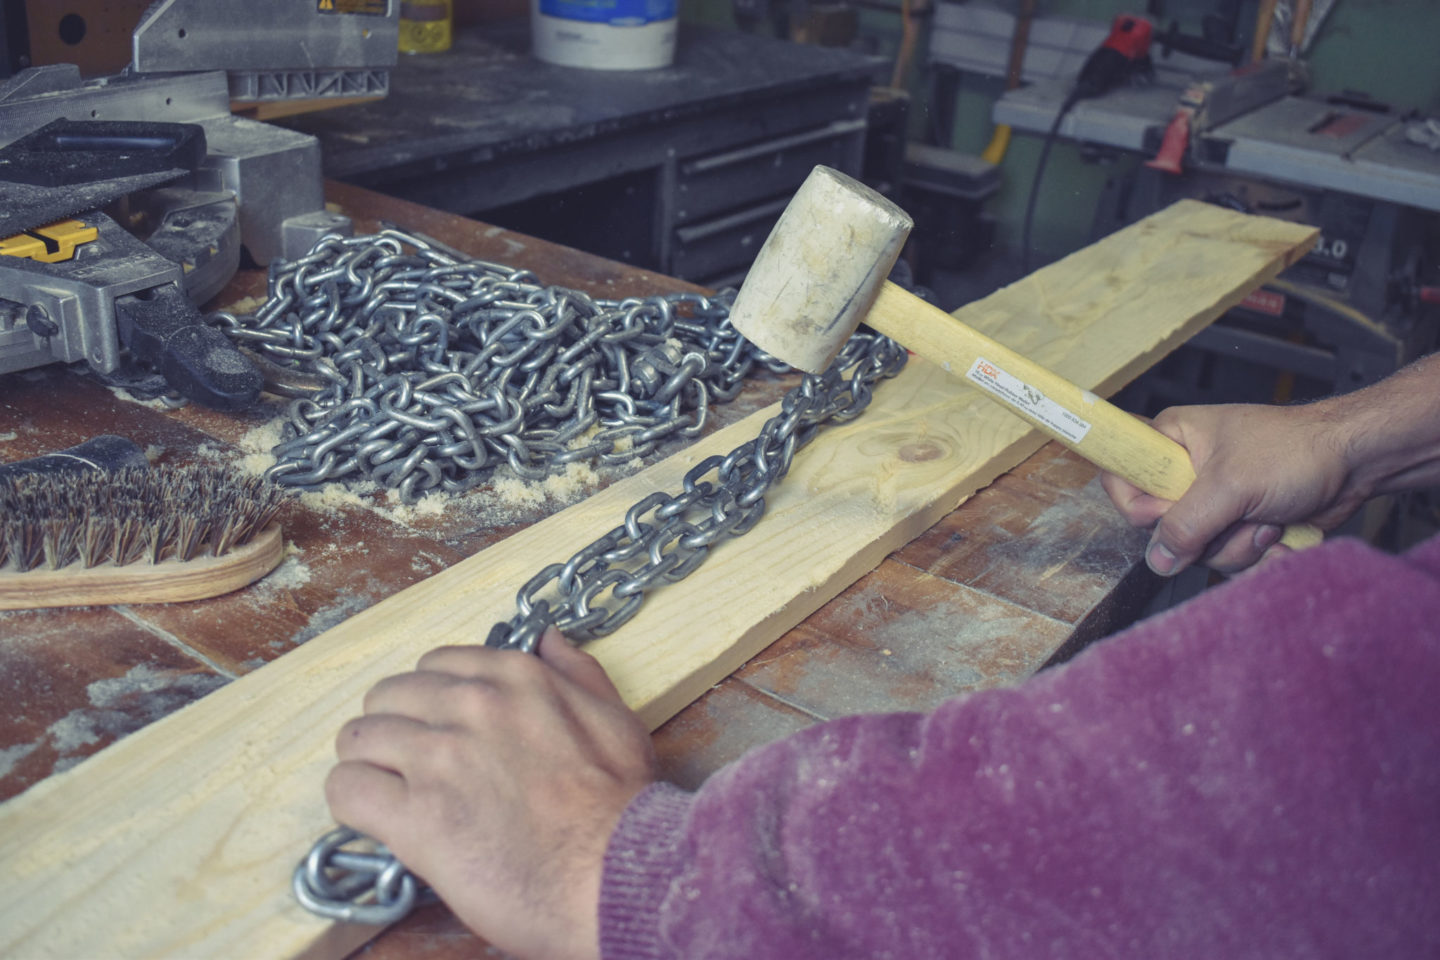
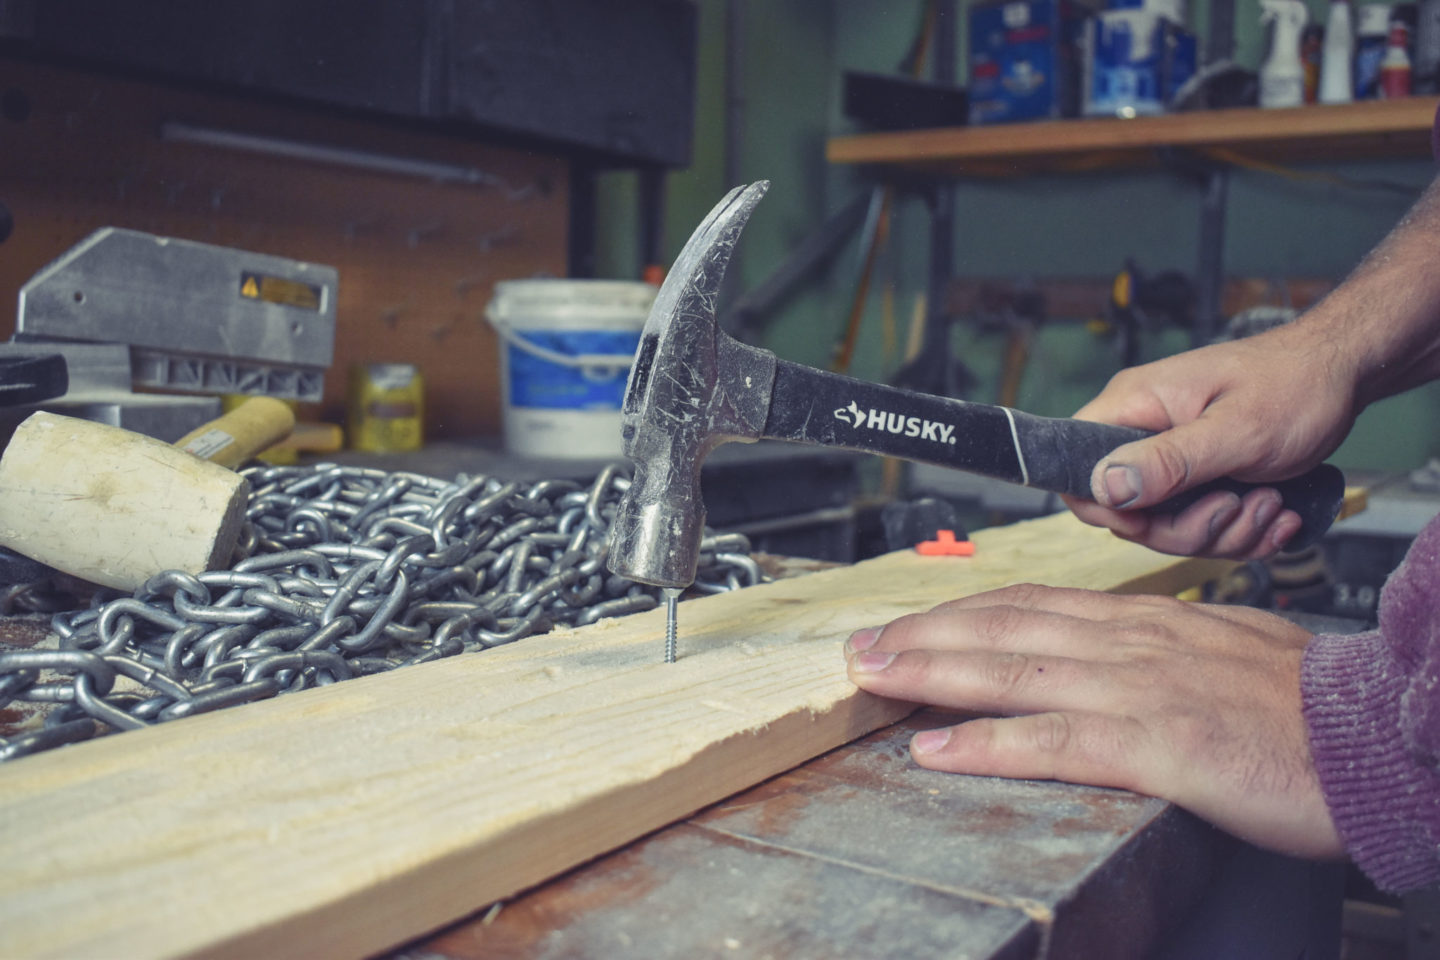
The next step consisted of beating the boards up more. We took nails and chains, and happily hammered them into our pine. Bad day at work? WHAM. Mad that it’s winter outside? WHAM. Thought there were 10 episodes in Season 6 of House of Cards, but go back to watch the final two episodes only to discover that Episode 8 was the season finale? WHAAAAMMMMM. This gives the boards a really rustic feel, and the trick is to make it has haphazard as possible. You can hammer the nails in lying flat against the boards, or even as if you’re getting ready to hang a painting from it. In theory you can do this with any metal object you can find, so let your imagination run wild!
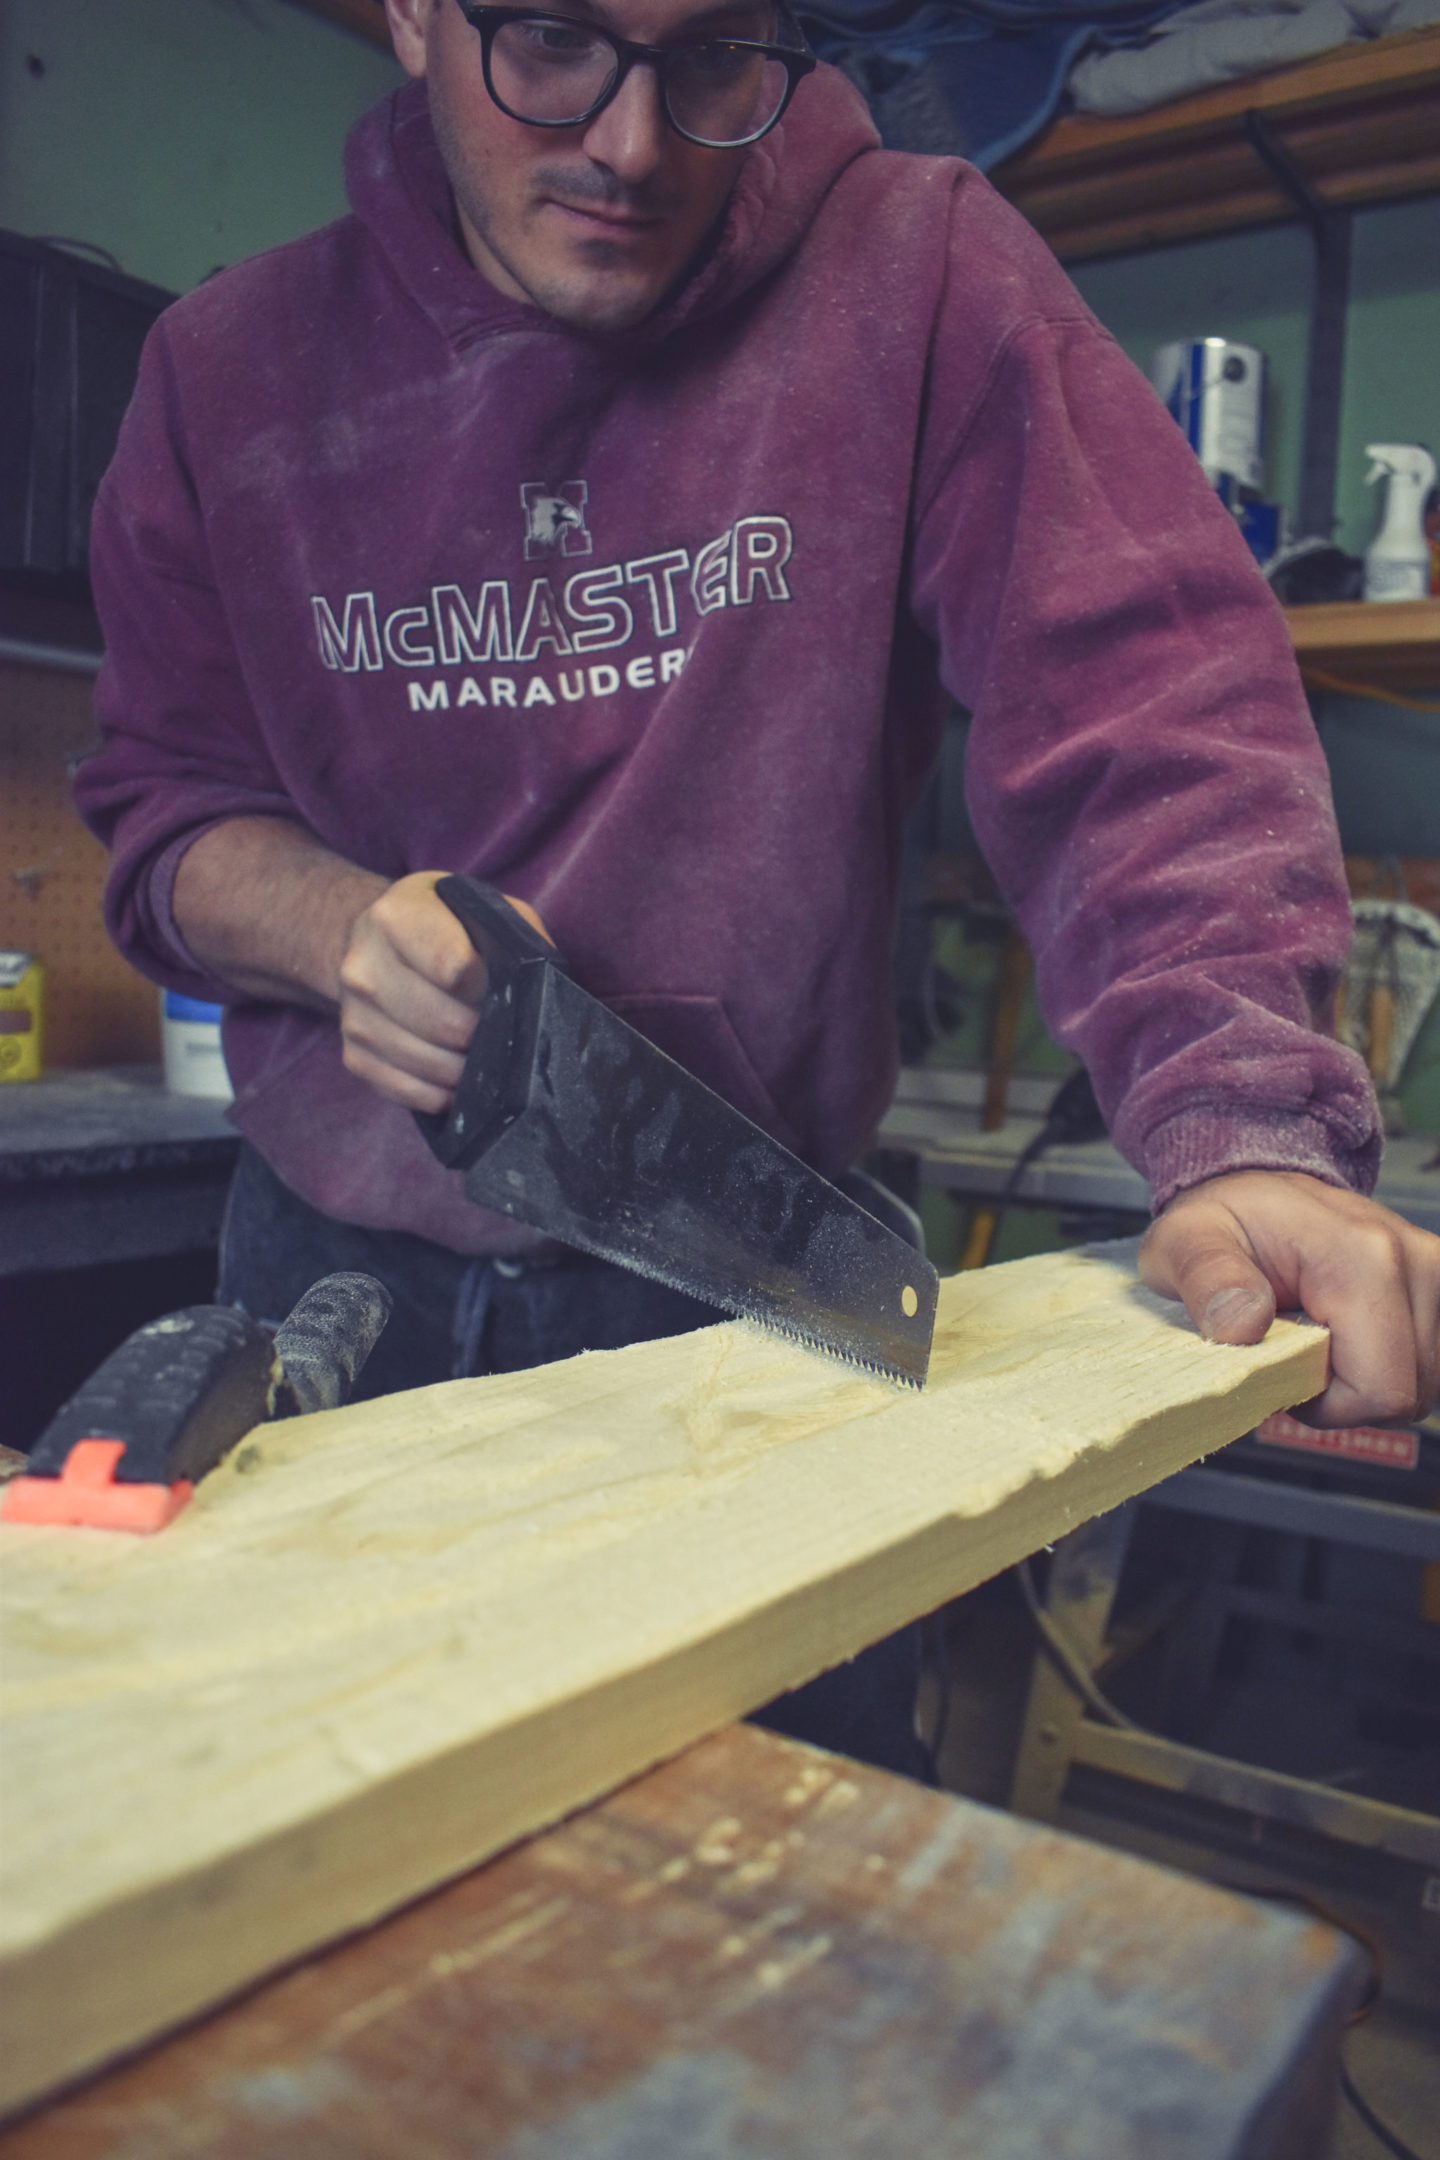
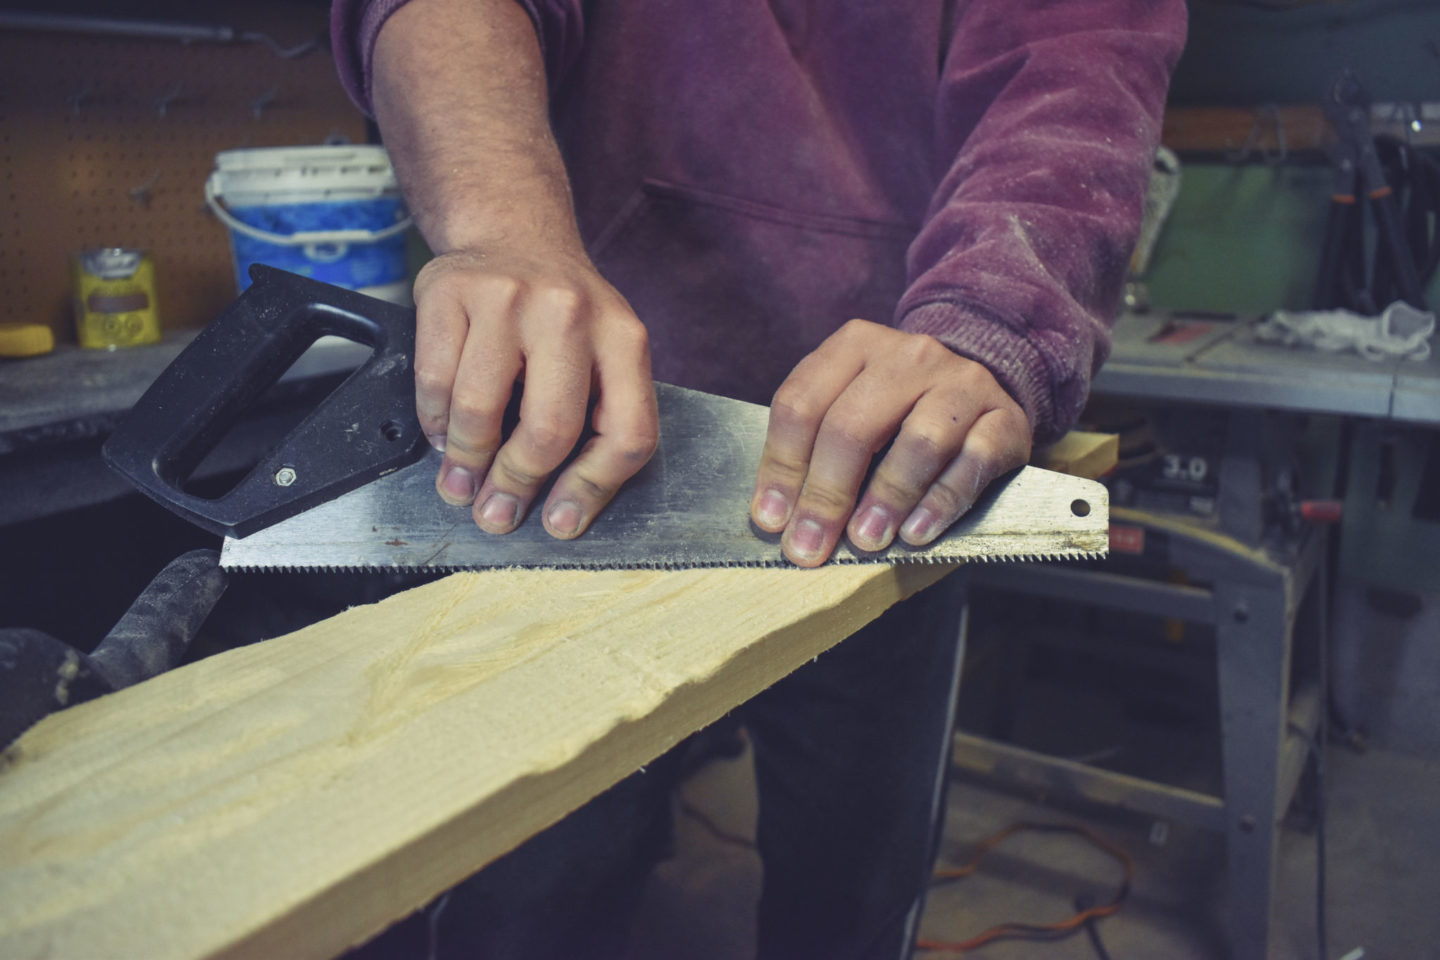
Next we took a saw and did some good old fashioned cutting. I was constantly worried that Bryan was going to saw right through the board, but somehow he managed to stop just at the perfect moment every time. He also held the saw at an angle and dragged the teeth across the wood, creating a really rough patch that anyone with OCD would want to instantly sand down. I think that was my favourite technique throughout the whole process, as once those boards were stained, they took on a unique appearance that really made them stand out.
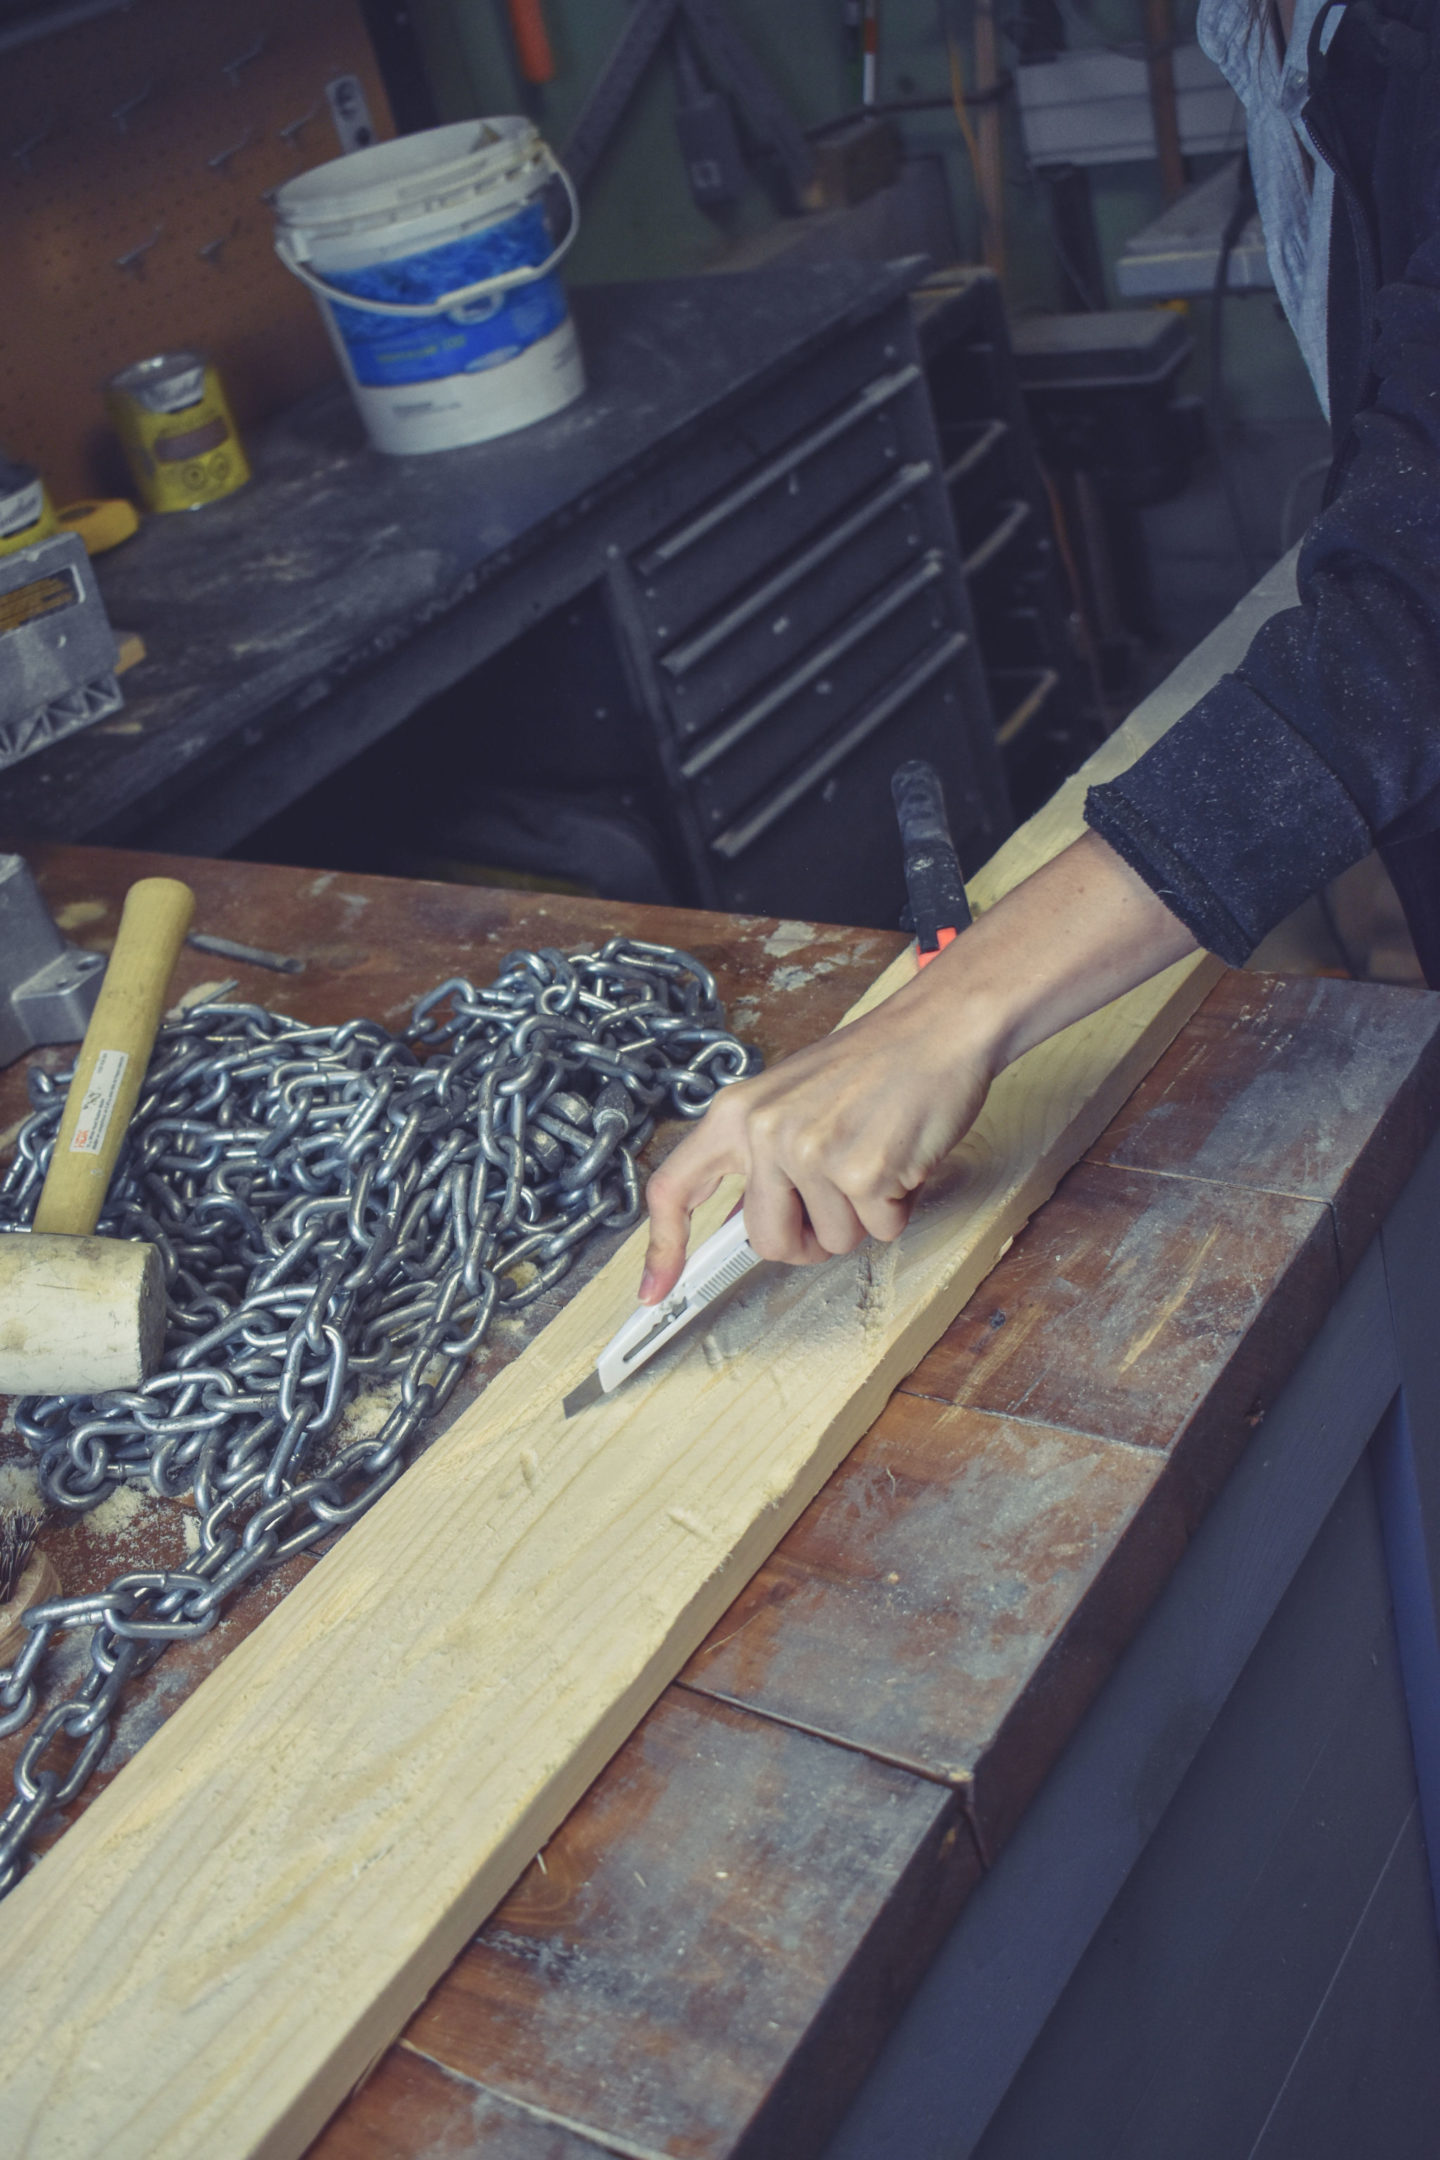
From here we took an exact-o knife and sliced the board randomly. Again, I loved this part because I didn’t even have to look at what I was doing – the messier, the better! Obviously Bryan was filled with anxiety at me holding the knife not looking at what I was doing while I was slicing the board and smiling at him like a maniac…but hey, you gotta make it fun somehow, right?! Straight lines, criss crosses, we did anything and everything.
Lastly, we stained the boards to give them that awesome weathered look like they’d been out in the elements for years. Fittingly, the stain we used was called “Weathered Oak” – and it couldn’t have been more perfect. The warm grey looked fantastic against the knotty pine’s natural colour, and with the now uneven surface of the boards, some areas turned out darker while others held on to the natural pine colour. The idea is to cover most of the board with the stain, getting into all of the indentations we made. But again, the beauty lies in the imperfection, so we didn’t spend too much time agonizing over those pesky crevices that the stain missed.


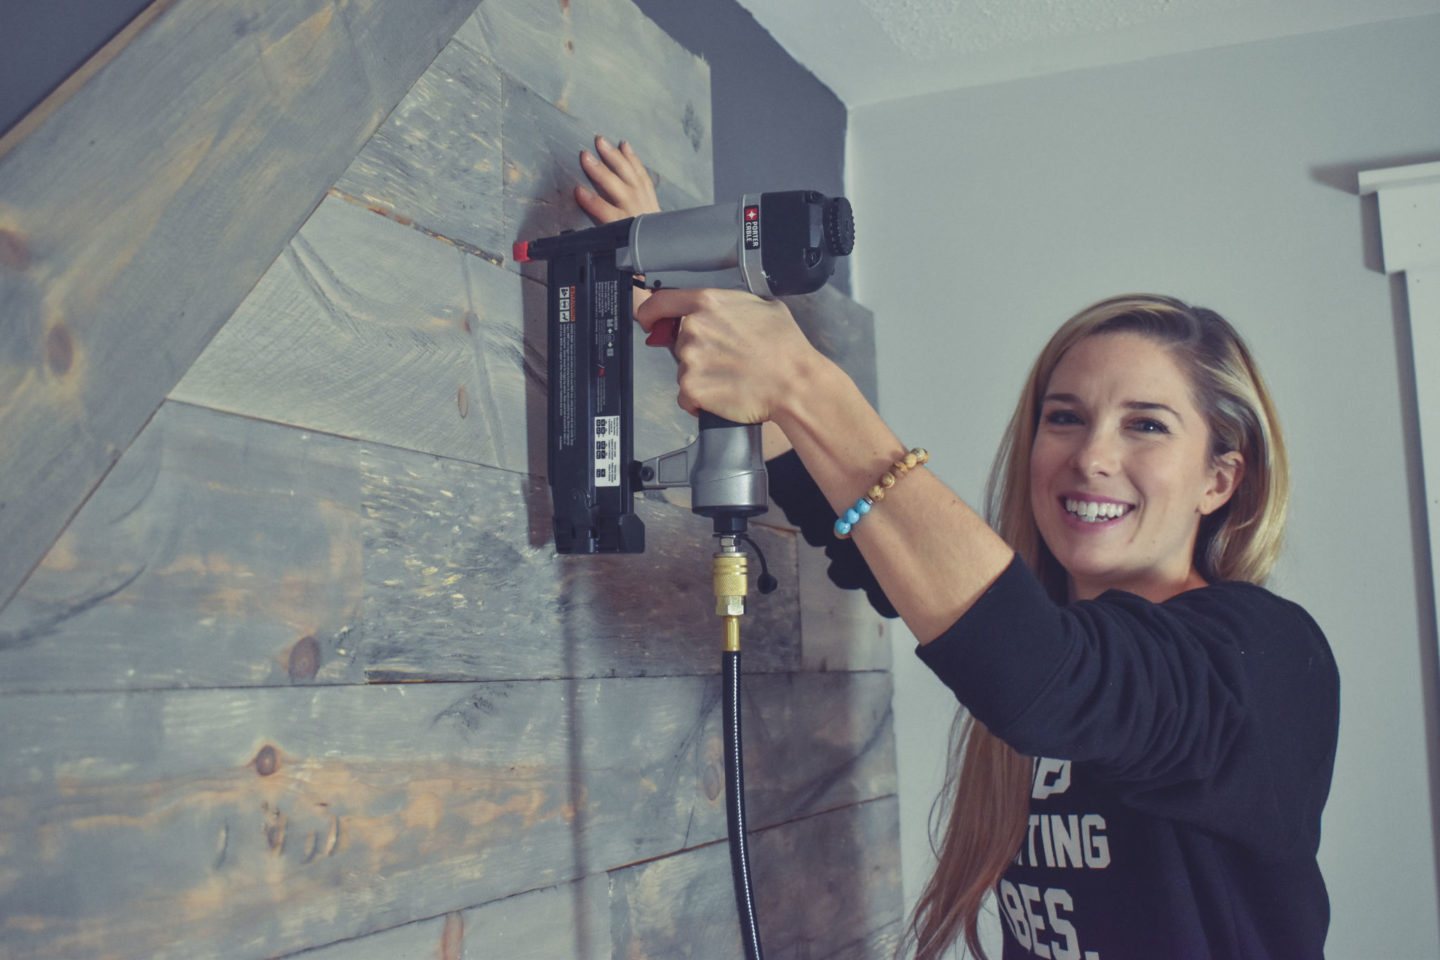
After letting the stain dry, it was officially time to put the boards up. The trick to making the wall really work is to ensure that no two lines match up…anywhere. It’s basically like creating a life-sized puzzle. Bryan was the mastermind behind this, so I won’t even pretend to take any credit. He cut, measured and placed, while I just held the boards and brad nailed them in (again, handing the power tools over to me? Bryan is a very trusting man). We decided to brad nail the boards directly into the wall, as we don’t plan on hanging anything heavy on our new barn wood, so there was no need for additional reinforcement.

After we nailed the final board in, we took a step back and admired our handiwork. I’m not going to lie, I was very impressed! The room had been instantly transformed. It’s really incredible to see an idea in your head come to life. I tend to sit on an idea for a long time before acting, but Bryan is the exact opposite – idea, plan, execute…and ASAP. I am so grateful for his gusto, know-how, and patience with me during this project while I ran wild with those power tools. There’s something really special about creating a piece of your home with your own hands, as opposed to buying it already made from a store. I encourage you to take on a project within your home that you can walk by every time and beam with pride – big or small, it doesn’t matter. All that matters is that it was made with love <3

Want to see how much a new coat of paint can change a room? Head over to our first home reno blog post to see the transformation!
